
ORTHOPEDICS/HIP & KNEE/ACL DAMAGE
A surgical therapy is frequently recommended for ACL tears that are common in sports activities damages.
Once an ACL surgery is decided, patient is committed to having a new ACL placed in his knee joint.
Defining the ACL Implant Type
ACL implants are of three types. (1) The patellar tendon, (2) The hamstring tendon, and (3) The cadaver (donor) implants.
Each implant type enhances a particular pros and cons; therefore, deciding which is the best can be an ambiguity.
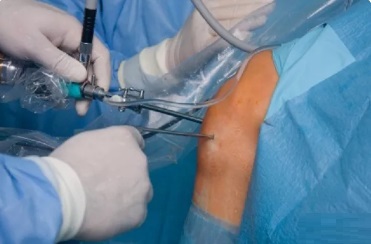
ACL Arthroscopic Surgery/Diagnostic
First, an arthroscopy is done by inserting an arthroscope into the knee joint to check the damage done to the joint.
The surgeon will then attest the ACL tear diagnosis, and will check if the meniscus, the cartilage, and other ligaments are also damaged or not because if the meniscus or the cartilage are as well injured, it would be normal to perform the entire damages at the same time as performing ACL restoration.
‘Harvest’ and ACL Implant Preparation
Once the ACL tear is confirmed, the implant must be attained, (a procedure called “harvesting” the implant).
In the case of a donor implant, the tissue must be thawed.
However, in cases the implant is coming from the patient having the ACL restoration, an incision will be made to acquire the tissue.
After attaining the implant, the tissue being used to create a new ACL is prepared to generate with the proper length and width.
Some extra may be performed to ensure the proper implant sizes and then this prepared implant is set aside until the knee is ready for the new ACL.
Tibial Tunnel
The next step will be to generate a place for the new ACL to sit within the knee.
Knowing that the ACL is right in the center of the knee joint and requires to be attached to the bone above and below the joint, the new ligament must start within the end of the thighbone and end within the top of the shinbone.
A drill is used to make a tunnel in the shinbone. The end of this tunnel in the knee joint is directly where the ACL should attach to the shinbone.
Femoral Tunnel
Through the tibial tunnel just created, a drill traverse straight through the middle of the knee joint.
A second bone tunnel is made from inside the knee up into the end of the femur. This bone tunnel will hold one end of the new ACL, and the tibial tunnel will hold the other end.
Pass the Implant
With these two bone tunnels, one in end of the femur, and another in the top of the tibia, the new ACL implant must be placed into position taking the place of the old ACL.
Secure Femoral Side of the implant
With the ACL implant in right position, it must be firmly fixed in its new position.
There are several techniques to secure the implant.
The most common is to use a screw to hold the implant end within the tunnel. This screw can be made of metal, or plastic-dissolvable material, or calcium-based substance.
Note that none of these materials has been shown to be “better” at securing the implant.
Secure Tibial Side of the implant
Almost similar to the femure side.
Once the implant is firmly fixed on the femoral side, tension is placed on the end of the implant so the new ACL will be well tight.
By the time, the implant will heal to the surrounding bone, making the fixation devices needless.
Not that the materials used to fix the implant are usually kept in place if not causing problems.